A few years ago we purchased two new lights for the landing. These are square relatively low profile lights which use an array of LEDs. Normally, the LEDs in units such as these are not replaceable and if they fail the entire fitting has to be replaced.
Well, a few weeks ago one of the lights failed and I decided to try to repair it because (a) it would be cheaper, (b) they are a matched pair and finding a new one the same was going to be tricky and (c) the principle of the thing!
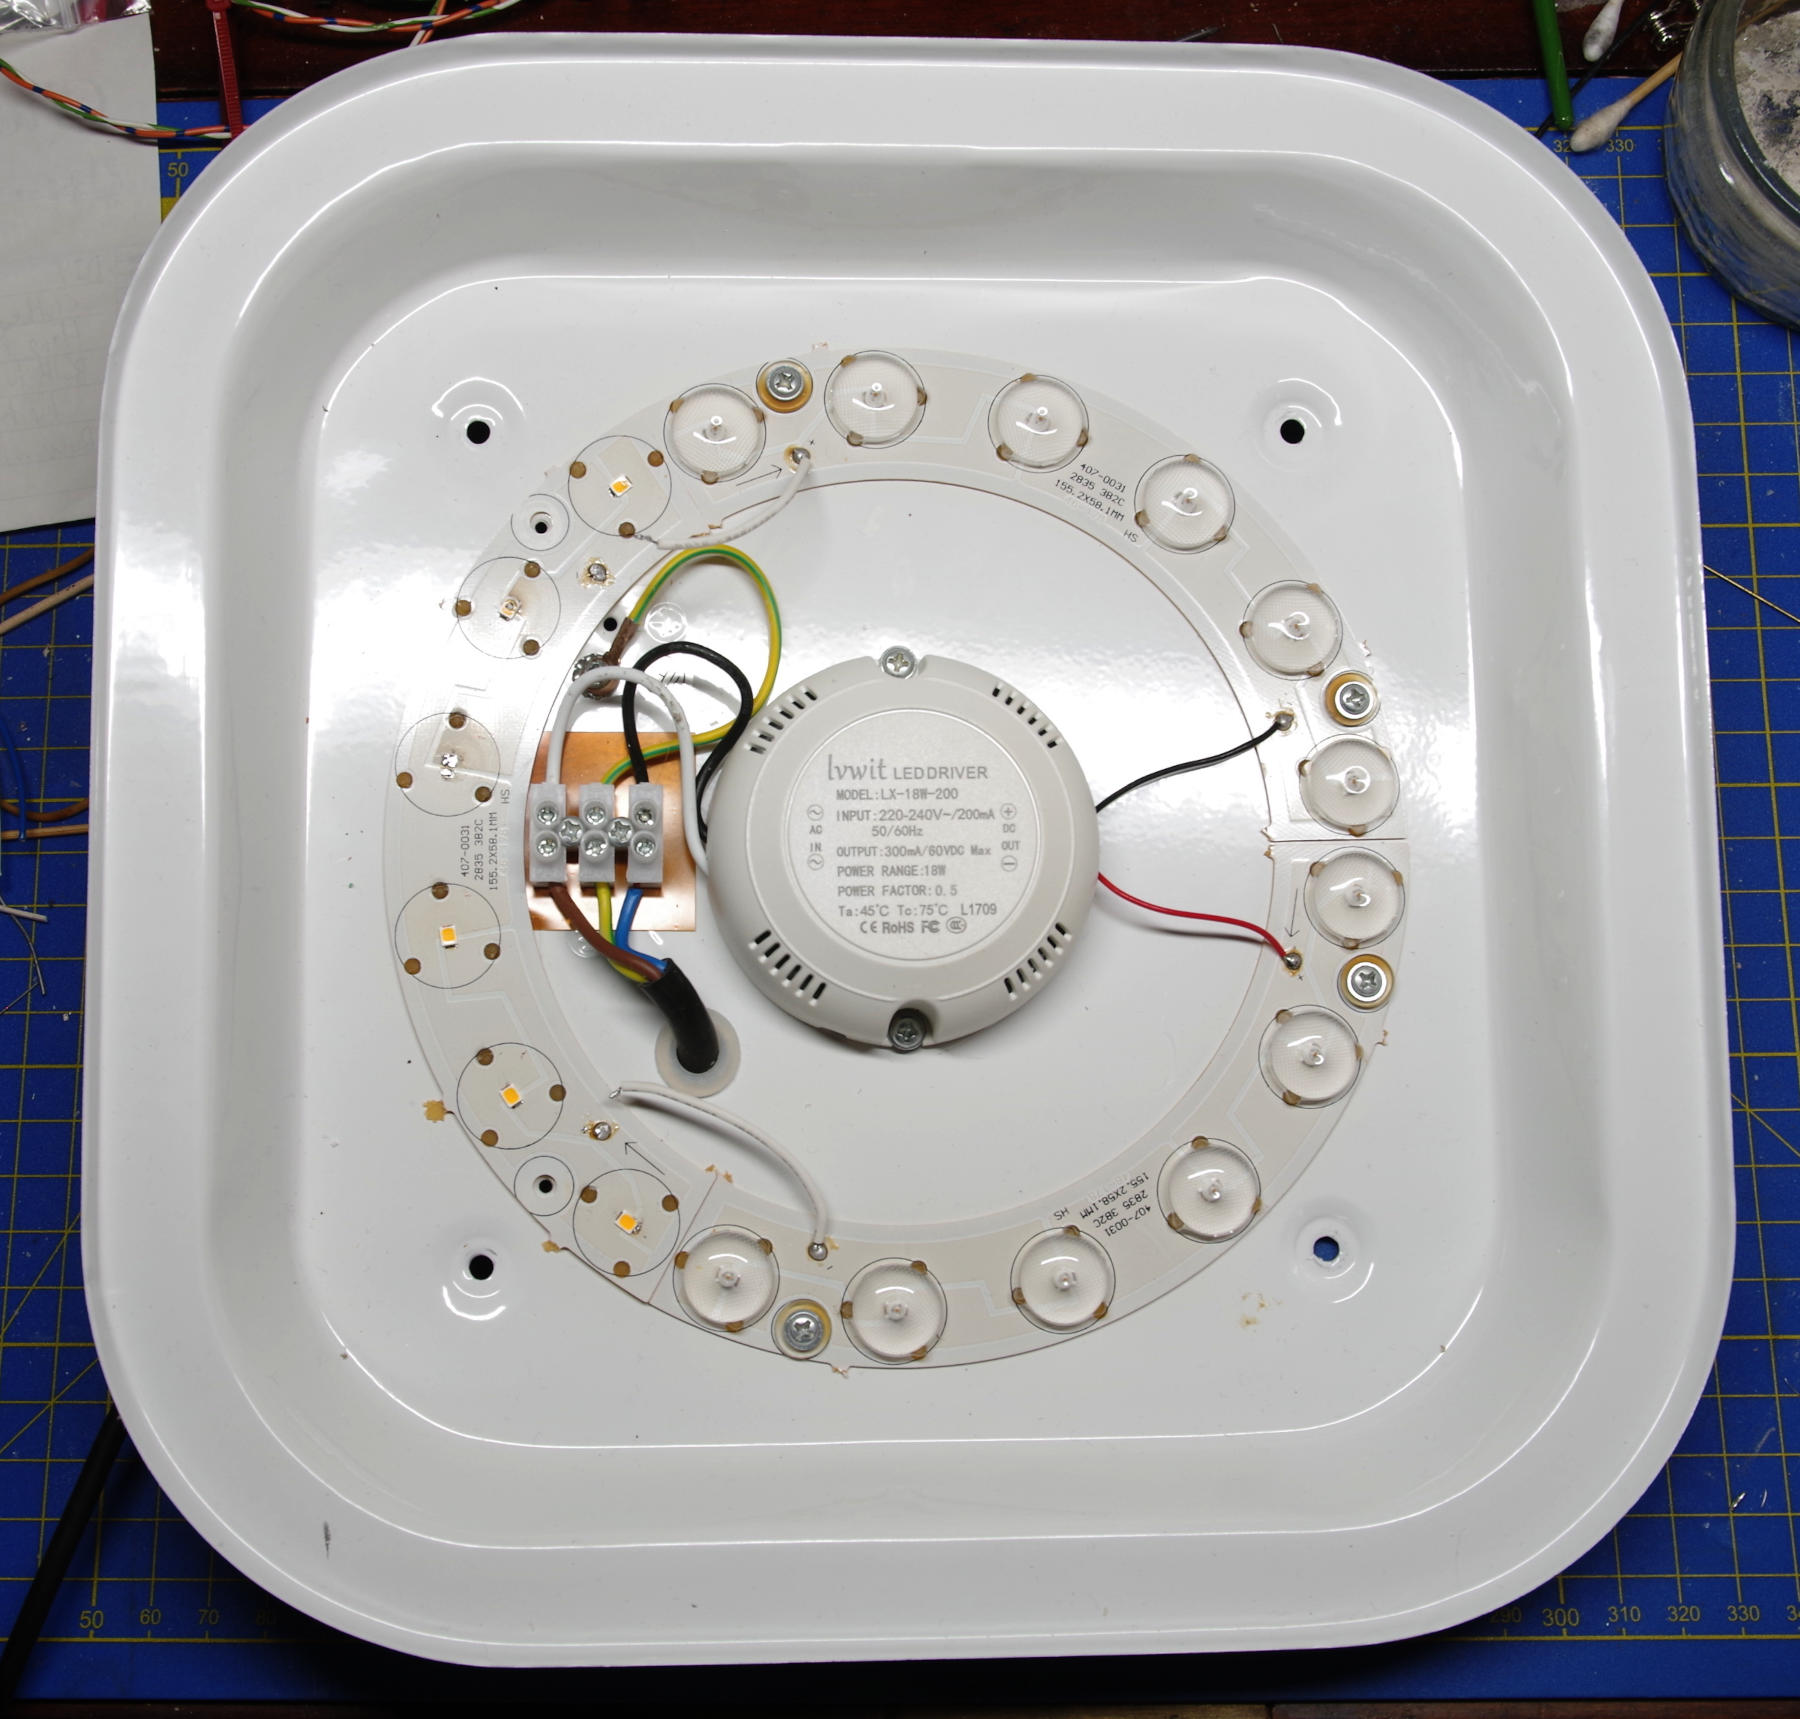
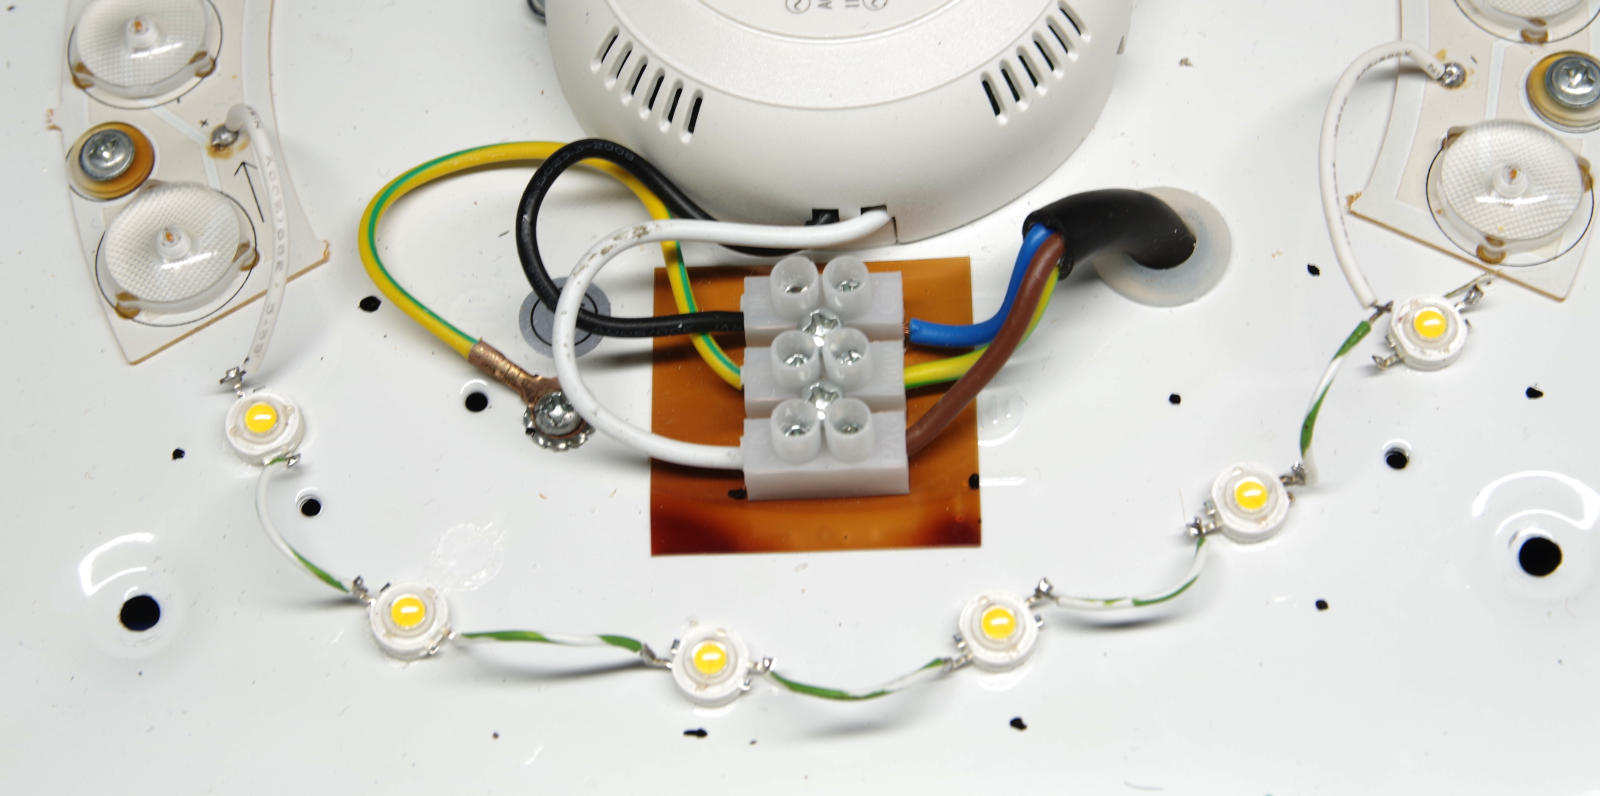
The photo below shows the inside of the light after I had removed some of the plastic lenses to see what was going on. As you can see, there is a central PSU which appears to be a 300 mA constant current source (which makes sense for driving LEDs) and three identical LED boards each containing six LEDs with the boards wired in series. Note the strange white PCB material. I believe that these are thermally conductive PCBs. When the light is on the metal case under the LEDs gets quite warm.
I imagined that the LEDs would all be wired in series as they are basically current driven devices, but no. Each board is actually wired as shown below.
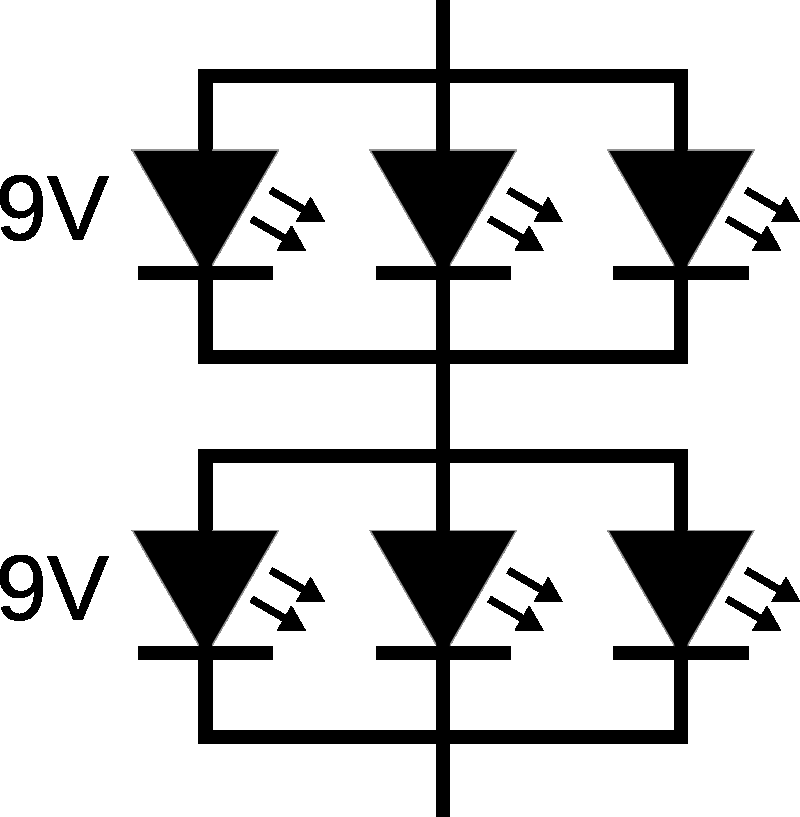
This is very strange because there is a golden rule in electronics that you never wire diodes in parallel. The I/V curve of a conducting diode is very steep (i.e. a small voltage change makes a large current change). Two diodes – even from the same batch – will have different curves so with the same voltage (as above) each diode will have a different current.
By measuring voltages it didn’t take long to find out which three diodes had failed. I removed these for a closer look.
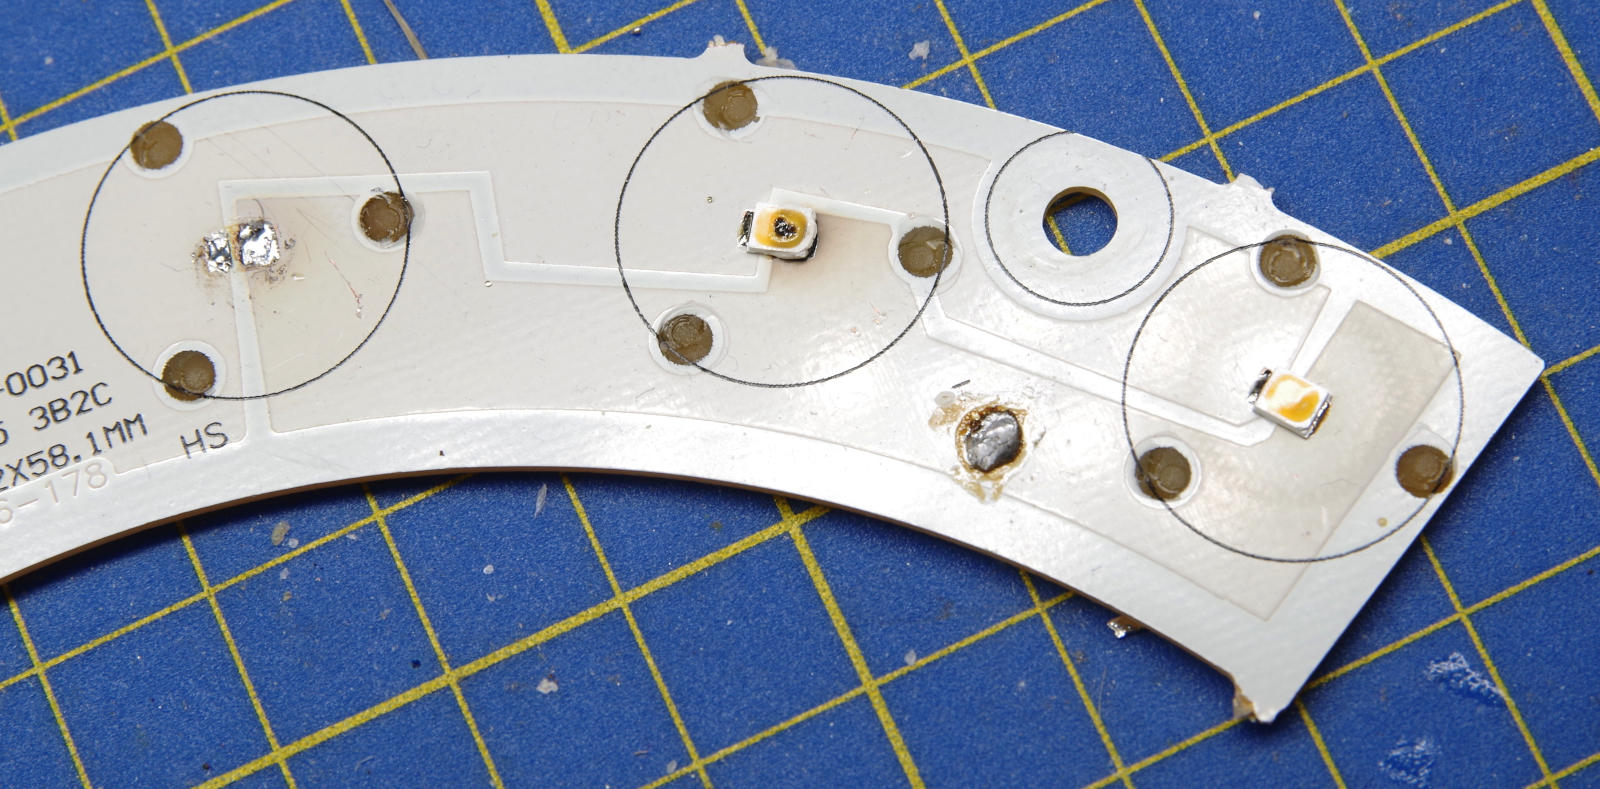
In the photo I have already unsoldered the left hand LED, but it looked exactly like the centre one. It is clear to me that the right hand LED must have failed first, perhaps due to it getting more of than its expected 100 mA and this then increased the current on the other two which would have burnt out spectacularly very soon after.
My first thought was to purchase some replacement surface mount LEDs and I did find a few which seemed like they might be suitable. But soldering surface mount components is tricky so I wondered if there was an easier solution.
I observed that in addition to 9 V / 100 mA LEDs you can also buy 3 V / 300 mA ones. If I wired six of these in series then I would have a module which took 18 V at 300 mA just like the one I had removed. I’ve no idea why the lamp manufacturer doesn’t use these 3 V LEDs as they seemed to be the same price as the 9 V ones.
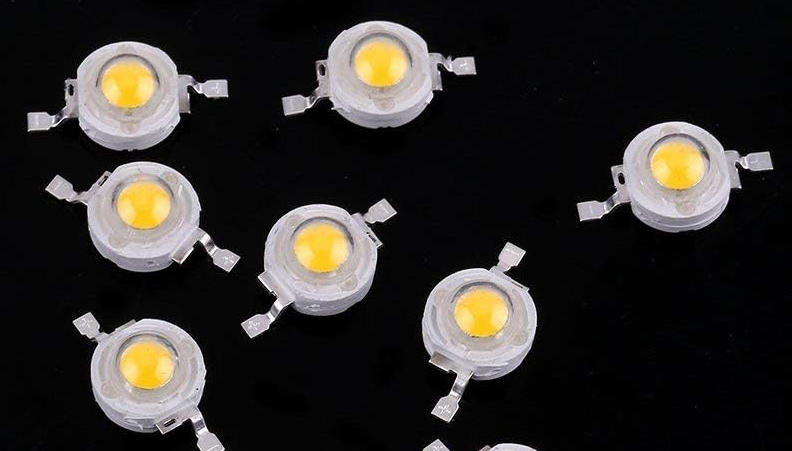
The LEDs I finally settled on are shown below. I got a bag of 50 from Amazon for just over £5 including postage although they did take about two weeks to arrive from China! They are about 7 mm in diameter and my plan was to just stick them to the case and run wires between them.
When they finally arrived I quickly wired six in series to test them. I didn’t fix them down but figured that if I only turned them on for a few seconds they wouldn’t overheat. Nothing happened!
I then tested each LED and found that whilst two seemed to be working, one was a short circuit and three were open circuit! How had I managed to break them, particularly since it seems impossible to fuse three that are in series? Surely when the first one breaks it will stop the current and protect the others?
I then tested unused ones from the bag and was shocked to discover that most of them didn’t work. About 30% were open circuit, 30% short circuit and 30% worked. The remaining 10% had less common faults like a forward drop of 0.7 V instead of 3 V. So, I had purchased 50 LEDs and got about 15 working ones!! How such a high failure rate and poor quality control is possible, even in China, is a mystery to me. I complained to Amazon and they gave me a full refund with no need to return the LEDs.
My initial idea for fixing them was to use some sticky thermal heatsink pads that I already had, but these turned out not to be strong enough. What I really needed was some thermal glue but I didn’t have any. The base of each LED consisted of a metal heatsink (isolated from the power) surrounded by the white ceramic body. I therefore put a small smear of heatsink compound on the metal surrounded by a thin ring of glue on the body. This seemed to work and I soon had six LEDs fixed down and connected.
When I switched on I was delighted to get lots of light, but when I measured the voltages I discovered that whilst the PCBs dropped 17.75 V, the new LEDs dropped a total of 23.7 V. Clearly, they are closer to 4 V drop at 300 mA. I didn’t want to over strain the PSU so I disconnected one LED. I left it glued in place as it will be useful if I have any more failures.
I soak tested the light for about 24 hours and then returned it to the ceiling where it has been working just fine for the last week of so.
A Shocking Discovery
When I inspected the inside of the lamp it seemed to me that it was quite a safe looking thing. Clearly, 240 V AC goes in via the relatively well protected terminal block whilst a lowish DC voltage comes out of the PSU to power the LEDs. The label says “60V Max”, but open circuit it was more like 80 V.
Imagine my shock – literally – when I got a nasty belt from the LEDs!! I decided to measure the voltage between the black wire and the earth which was about 120V DC and more than 200V AC.
Maybe this is leakage via a capacitor and there isn’t enough current to hurt you, but it gave me quite a jolt. I measured the still working light on the ceiling and it was basically the same.
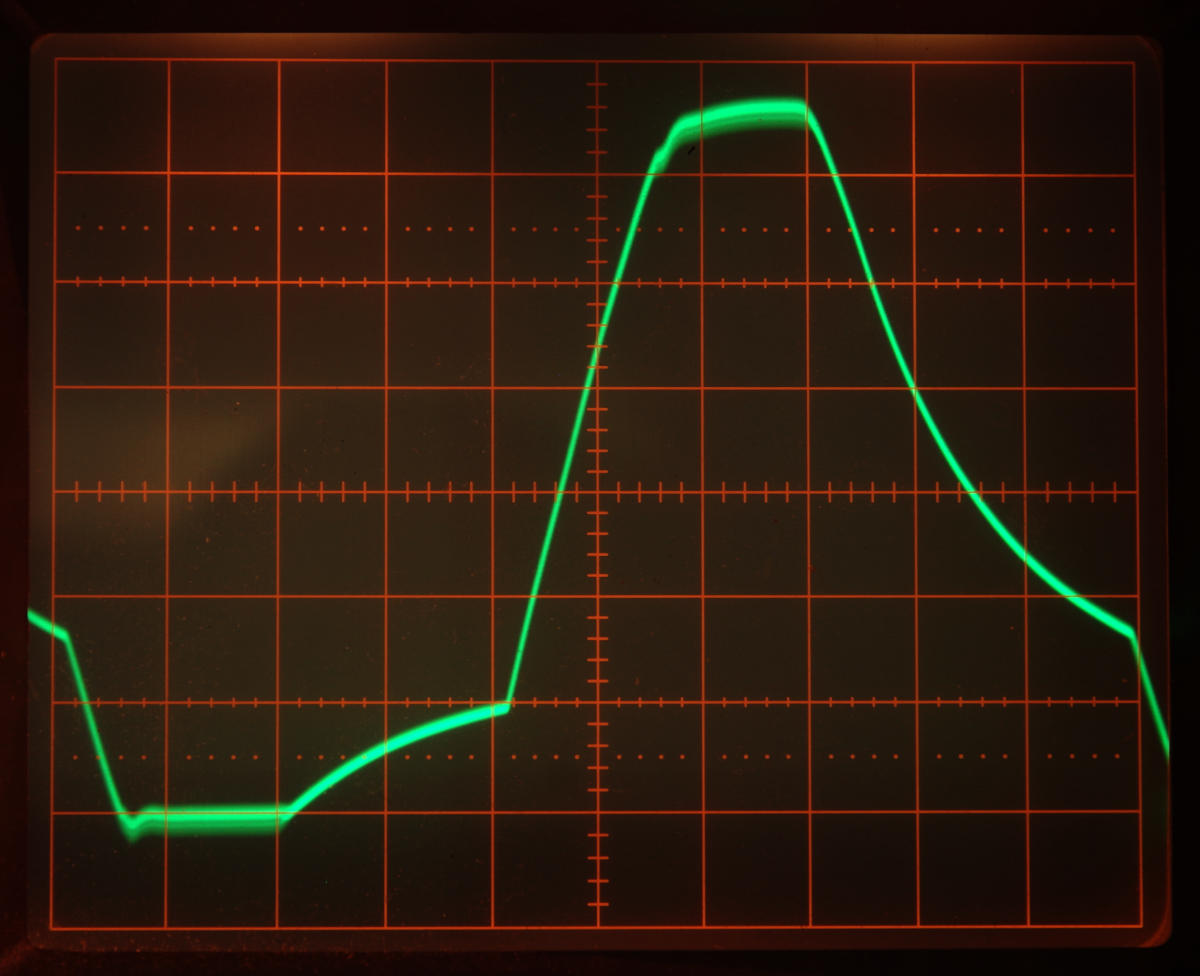
I decided to use my old but trusty analogue oscilloscope to see what was going on and you can see the result below. The scale is 2 ms/div and 50 V/div with line trigger. Zero volts is two divisions from the bottom of the scale. The voltage between the red wire and earth looks exactly the same but is obviously about 60 V higher!
I didn’t experiment with loading this, partly because I didn’t want to accidentally trip the house RCD. I can’t help feeling that these lights shouldn’t produce this much voltage, but since they live on the ceiling, are enclosed and earthed I decided to leave them and just take care if I ever need to open them in the future.
Update – October 2024
Unfortunately, the new LEDS have turned out to be very unreliable. After working OK for a few weeks they have started to fail and three have now broken. In each case the LED basically goes almost open circuit. It isn’t practical for me to keep replacing these every week or so. I’ll therefore see if I can buy some higher quality replacements.